Welcome to Narrative Studio! This guide will walk you through building your very first narrative step-by-step using the Narrative Studio interface. We’ll show you how to use the core components in the UI to create a simple narrative with three key elements: Moments, Interfaces, and System Actions. By the end of this guide, you’ll understand how to structure your narrative into the Interaction, Context, and System lanes using the main features of the interface.
Setting Up the Canvas, Script, and Lanes
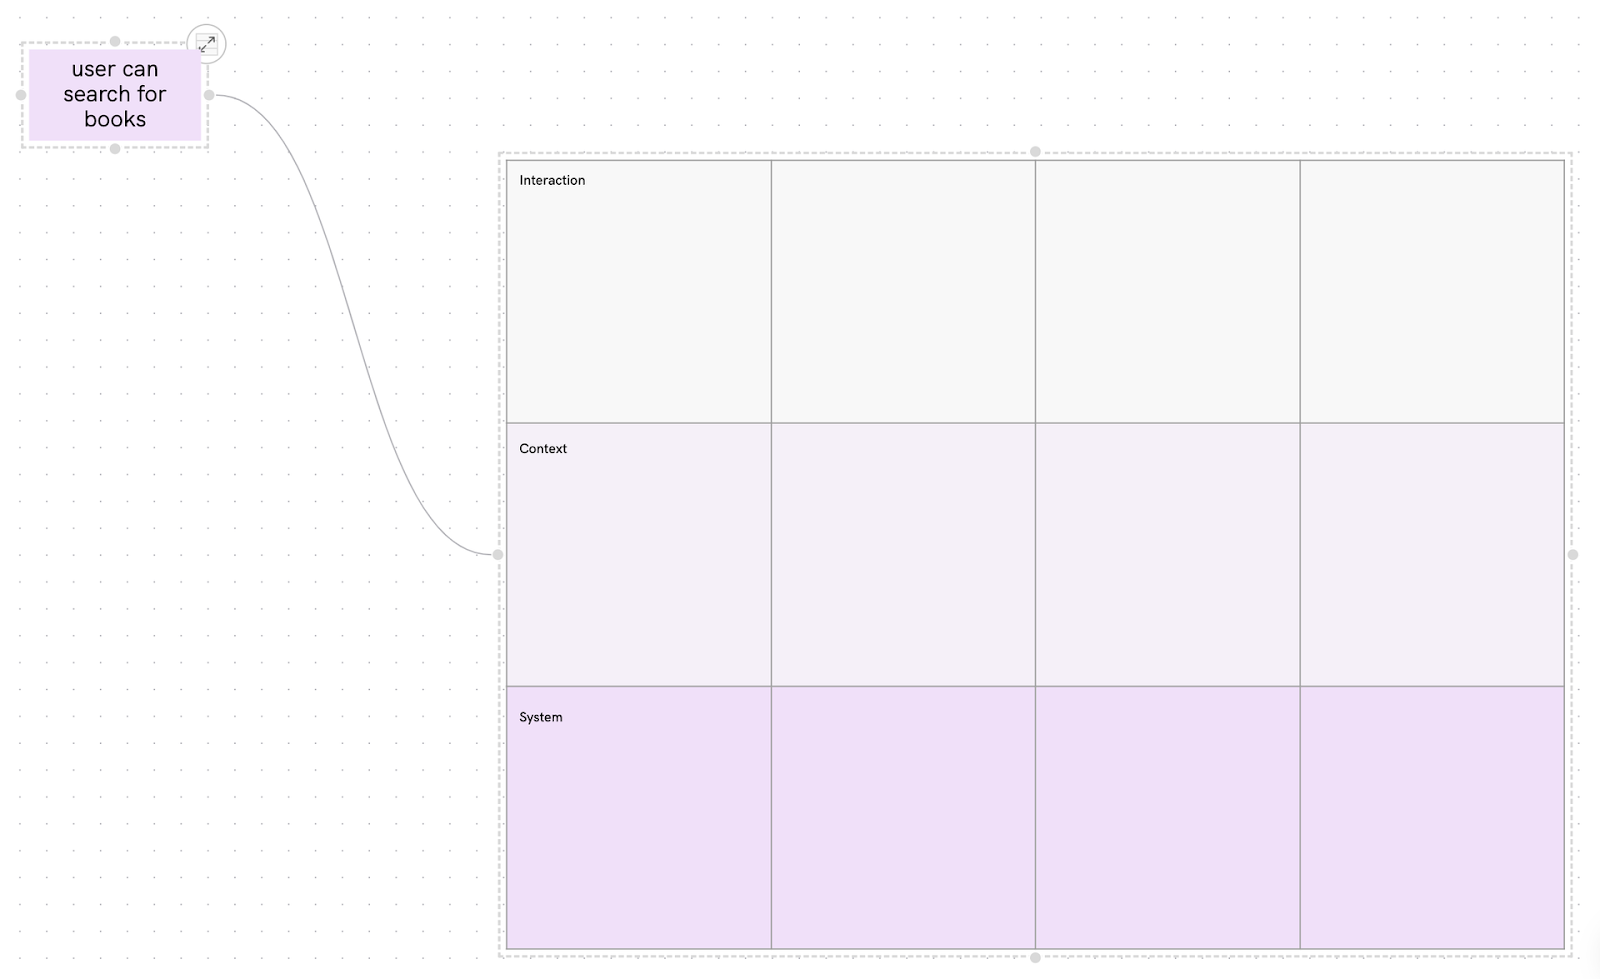
When you start a new narrative in Narrative Studio, you’ll be presented with a blank canvas. You’ll need to add a Narrative Script.
How to Add a Narrative Script:
- Click on the “Narrative” button in the toolbar.
- Click anywhere on the canvas - alternatively drag and drop the Narrative from the toolbar into the canvas.
- A “Narrative” sticky will appear. Double-click inside the sticky and type in the desired Outcome of that Narrative.
- Click the expand button in the upper righthand corner of the sticky. This opens a Narrative Script.
You now have a Narrative, and attached to it, a blank Narrative Script. The script is organized into three horizontal lanes:
- Interaction Lane (Top Row): This lane captures what the user sees and interacts with.
- Context Lane (Middle Row): This lane explains the purpose of each interaction.
- System Lane (Bottom Row): This lane represents the backend operations that support the user’s actions.
There is also a vertical plane to consider. Each column in the script is called a Frame.

Interface Tip:
- The canvas is fully scrollable and expandable, allowing you to pan around with your touchpad or by clicking and dragging with the mouse.
- Adding Your First Moment
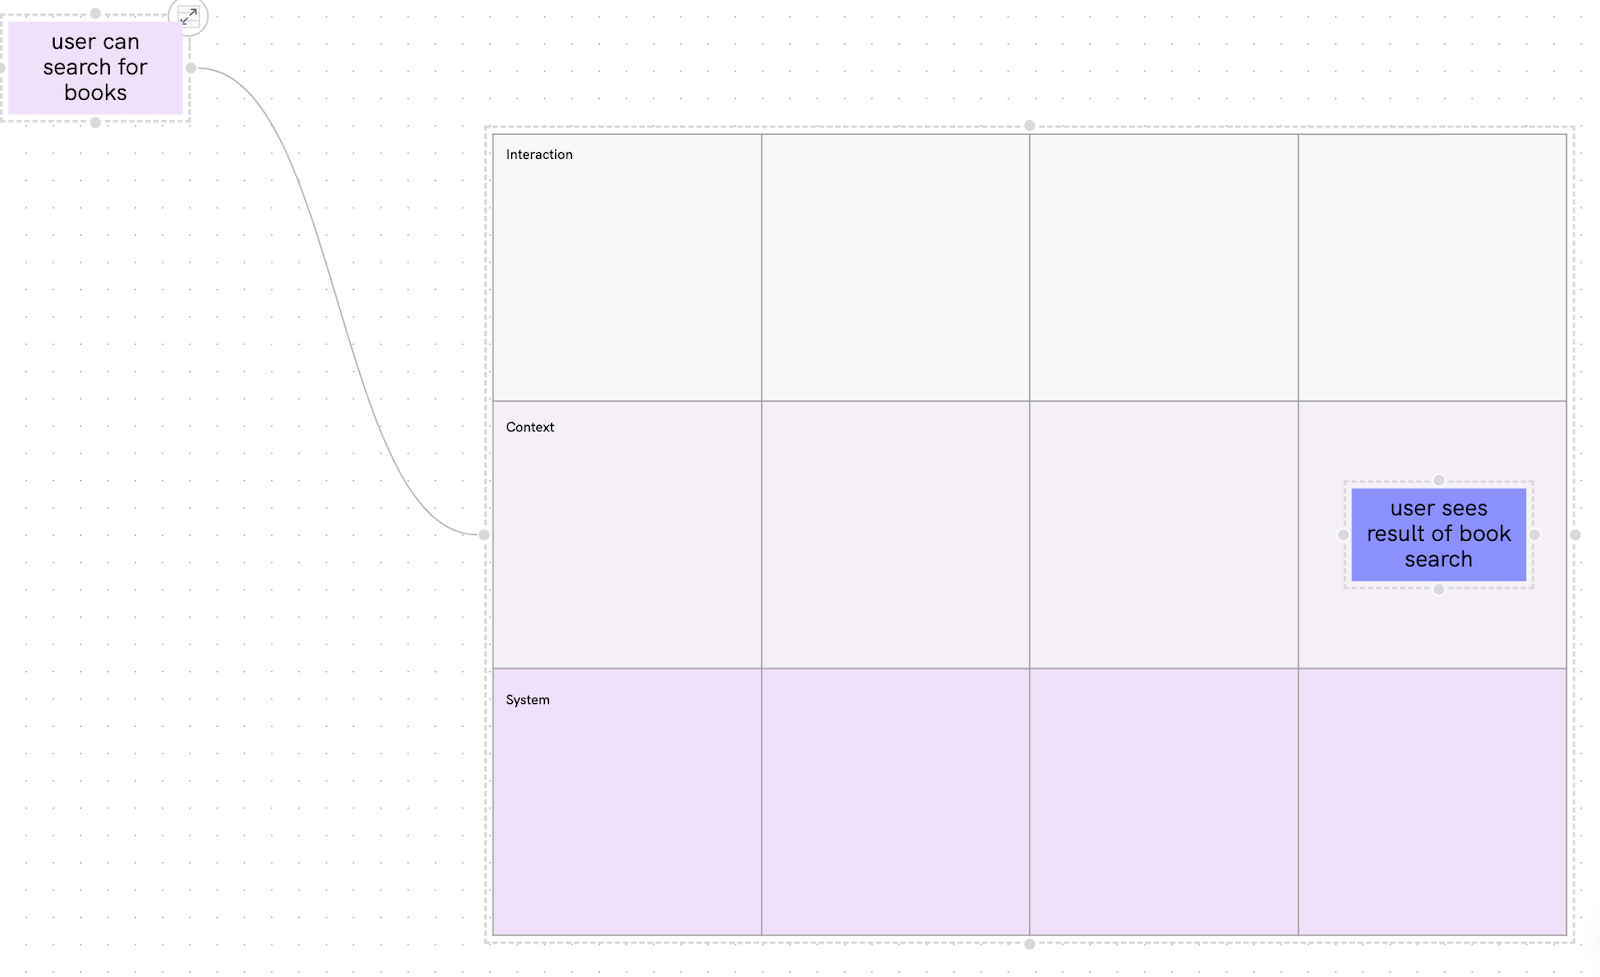
A Moment captures the user’s intent or goal at a specific point in the narrative. It is created in the Context Lane and represents what is happening from the user’s perspective.
How to Add a Moment:
- Click on the “Moment” button in the toolbar (purple sticky).
- Click anywhere in the Context Lane to place your new Moment sticky. Alternately, drag and drop straight from the toolbar to the Script.
- Name the Moment by double-clicking inside the sticky and typing in a description, such as “User sees the result of book search.”

Visual Confirmation:
- The Moment sticky will appear in the middle row, indicating that it belongs to the Context Lane. It should appear as a purple sticky and include a short description that captures the essence of the moment.
Best Practice:
- Keep your Moment descriptions short and goal-focused to convey the essence of what is happening at that point in time.
- Adding an Interface Element
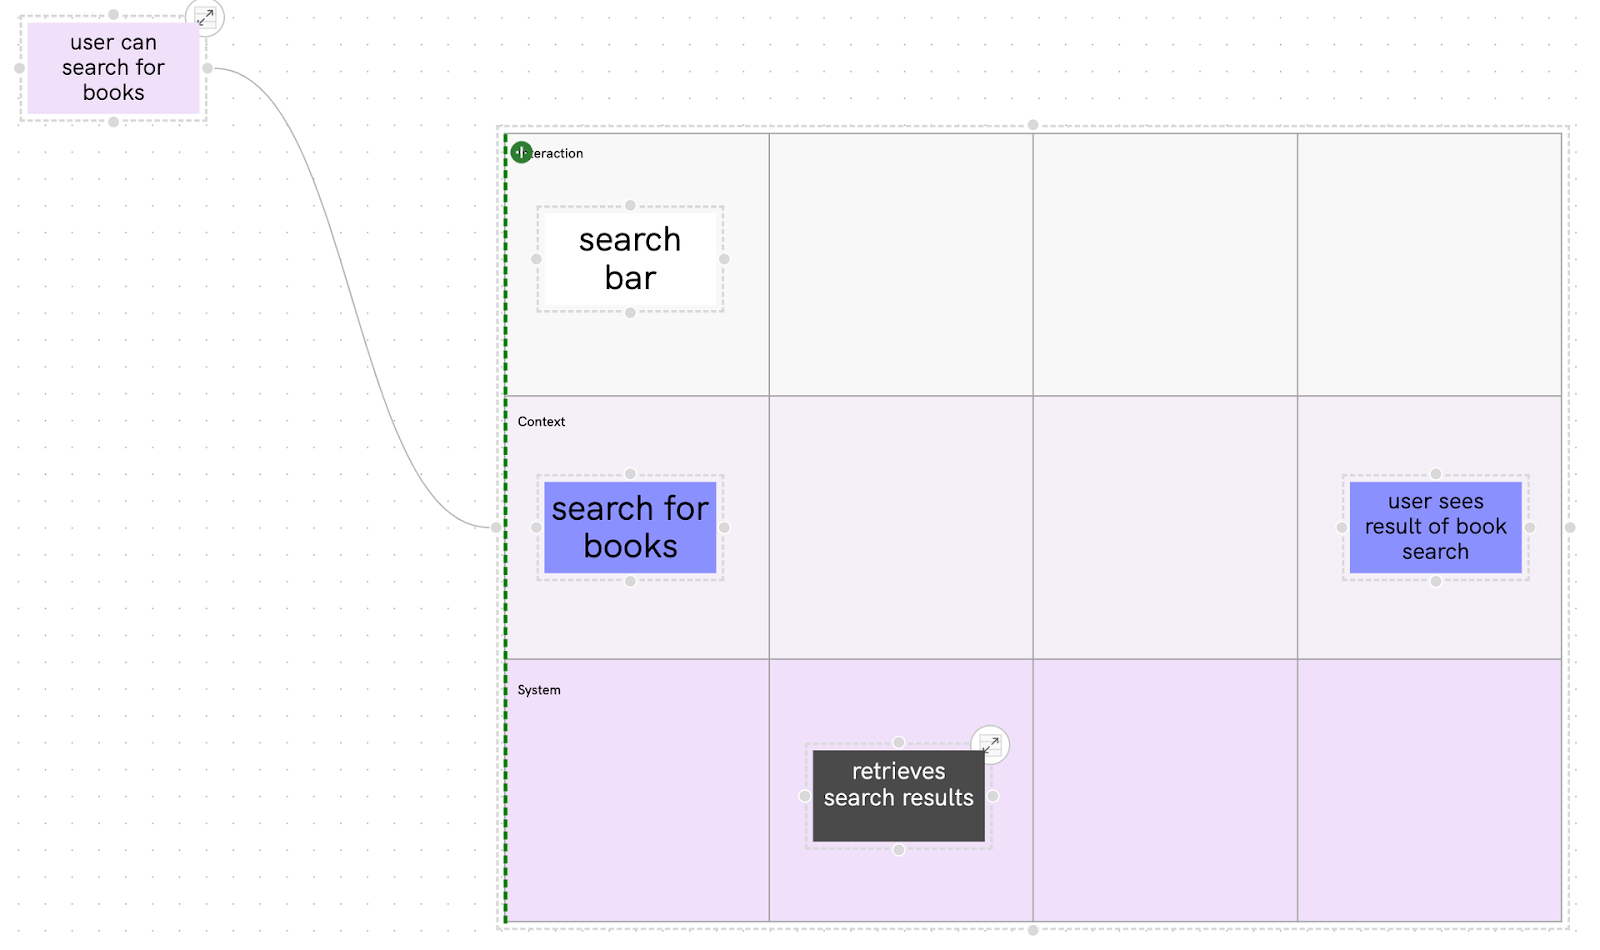
An Interface represents a visible UI component that the user interacts with, such as a screen, form, or button. Interfaces are placed in the Interaction Lane directly above the corresponding Moment in the Context Lane.
How to Add an Interface:
- Select the “Interface” button in the toolbar (white sticky).
- Click on the Interaction Lane directly above your first Moment. This vertical alignment shows the relationship between the Interface and the user’s goal.
- Name the Interface, for example: “Search Bar Interface.”

Visual Confirmation:
- The Interface should appear as a white sticky and should align directly above the Moment, showing that it is the UI component used to support the user’s goal.
Adding Visual References & External Resources:
- If you have a mockup or screenshot, you can attach it to the Interface sticky by clicking on the “Upload” icon in the toolbar, then clicking on “My Device” and selecting the image file or url you want to attach. This helps visually represent what the screen looks like.
- Using the same feature, you can also attach links to external tools and resources such as JIRA, Linear, or Confluence. Click the “Upload” icon in the toolbar and select “From URL”.
- Creating a System Action
A System Action represents the backend operations that occur in response to a user interaction, such as fetching data or validating inputs. System Actions are placed in the System Lane. They can be aligned directly below a Moment, or exist alone in their own frame, but they cannot be in the same frame as an Interface. This is because we are modeling a system based on moments in linear time and in a real system, an Interaction and a System Action cannot happen simultaneously.
How to Add a System Action:
- Click on the “Action” button in the toolbar (black sticky).
- Click on the System Lane directly below your Moment to place the Action sticky. You must place it in the adjacent frame, because you already have an Interaction in the same frame as your Moment.
- Name the System Action something meaningful, such as “retrieves search results”

Visual Confirmation:
- The System Action sticky will appear as a black sticky and will be positioned below the Moment, or in a frame following the Moment, showing that this backend process supports the user’s intent, or that the system responded to an input from an Interaction. The Action cannot be placed on the same vertical axis as an Interface.
Documenting Technical Details:
- If the System Action has specific requirements or dependencies, you can attach technical specs by selecting Spec from the Toolbar, or Schema and Query from the Overflow Pallet. This allows you to document API calls, data fields, or other technical details.
- Connecting the Elements Using Transitions
To show how the elements in your narrative are connected, use transitions to link your Interface, Context, and System elements.
How to Create Transitions:
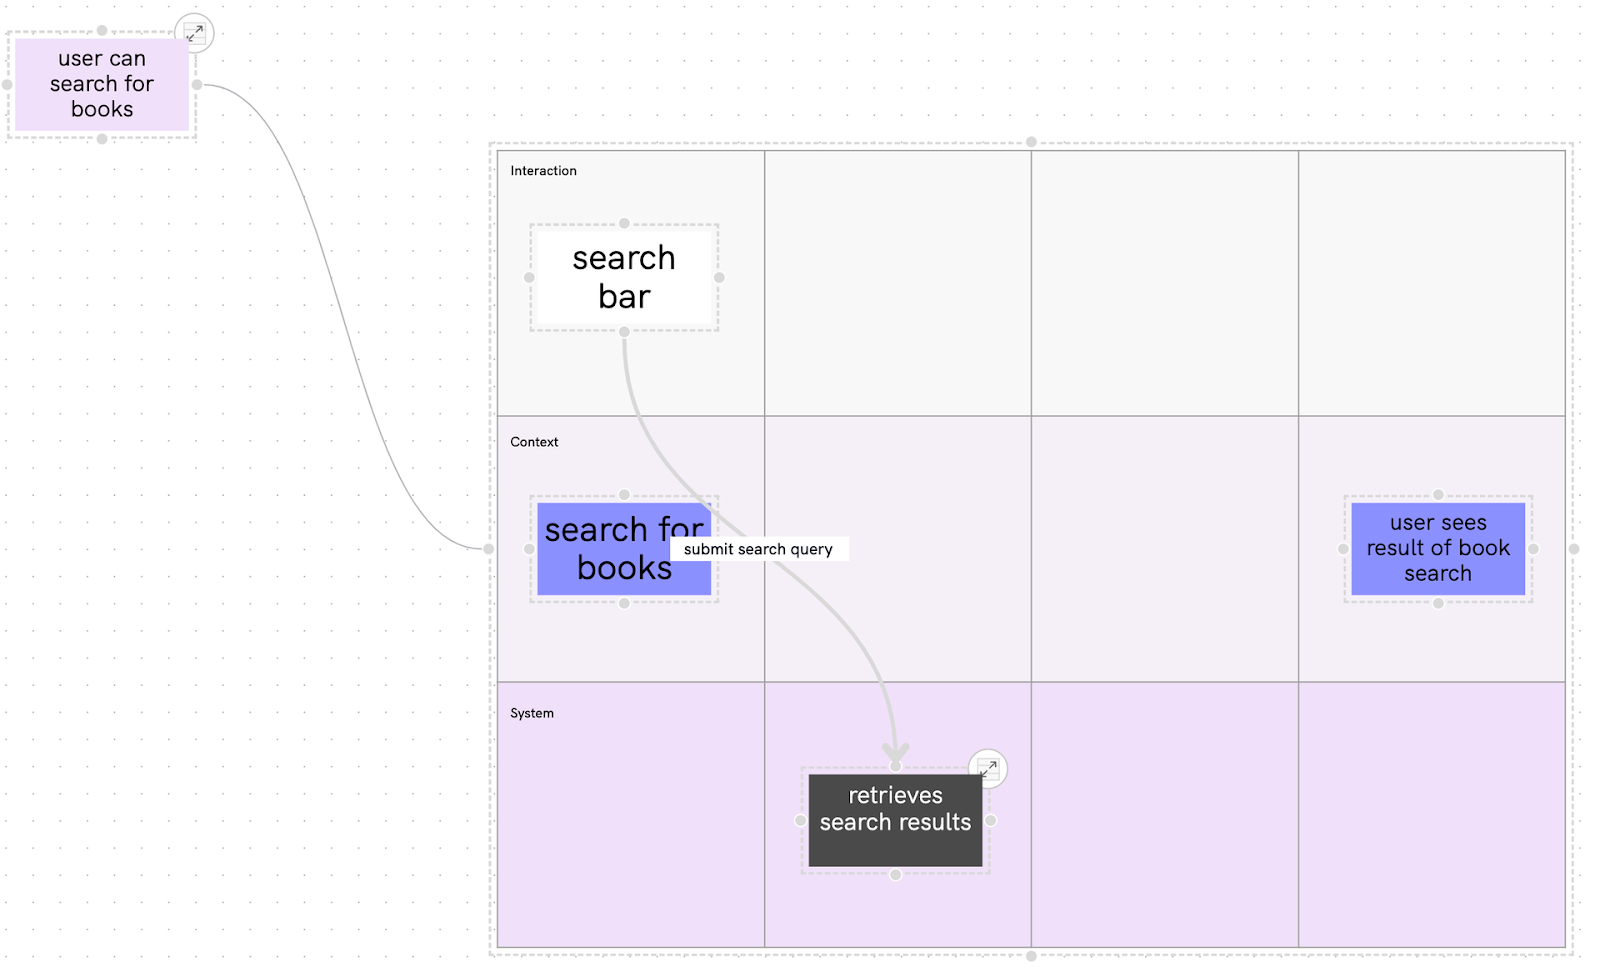
- Click on one of the connectors of the Interface stickies (e.g., “Search Bar”) and drag the arrow to one of the System Action stickies (e.g., “retrieves search results”).
- Name the transition by double-clicking on the arrow and typing “submit search query.”

Visual Confirmation:
- The Transition arrow should clearly link the Interface to the System Action, showing that the System Action is triggered by the user’s interaction.
Best Practice:
- Use clear labels for each transition to indicate what is happening at each step, such as “System processes request” or “Data sent to Interface.”
- Building Out the Next Step in the User Flow
Once your first moment and its supporting elements are in place, you can continue building the narrative by adding the next set of Moments, Interfaces, and System Actions.
Example: Viewing Search Results
- Add a New Moment: Place a new Moment in the Context Lane labeled “User views search results.”
- Create a New Interface: Add a new Interface sticky above the Moment in the Interaction Lane called “Search Results Screen.”
- Add a System Action: In the next frame, add a System Action called “System fetches search results data.”
Connect the Flow:
- Use transitions to show how the first Moment (searching for a book) leads to the second Moment (viewing search results).
Saving Your Narrative:
- Narrative Studio automatically saves your progress in the background - you don’t have to worry about manually saving the state of the Workspace.
Conclusion
Creating your first narrative using Narrative Studio’s interface is all about understanding the relationship between Moments, Interfaces, and System Actions. By following these basic steps and using the interface features effectively, you can build a clear and structured narrative that captures the user journey and backend processes in a visually intuitive format.
Now you’re ready to create more narratives and explore the advanced features of Narrative Studio to handle complex scenarios.
Want exclusive access to NDD content?
Become an NDD Pioneer. Sign up with your email to get access to new drops.